I’m going to be talking about creating a faux stained glass DIY project on Fox 26 Houston this morning. For now, I’m providing the step by step instructions. Check back later for images to go along with the steps and an image of the final result.
This post contains affiliate links.
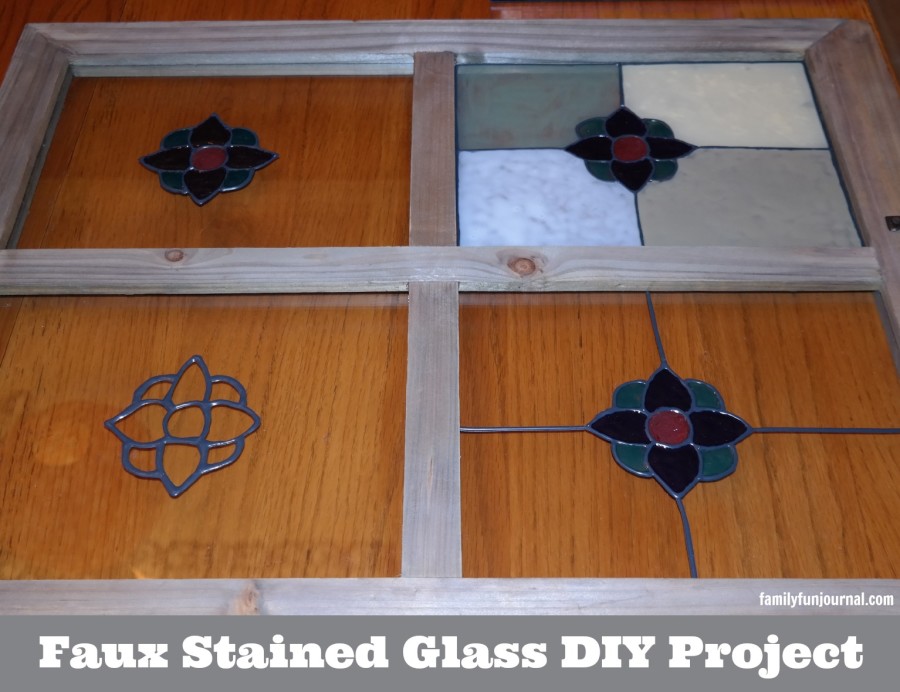
A faux stained glass finish is an inexpensive way to add privacy and interest to any window. I like to use this technique on front door glass. It is also great on the narrow windows that usually flank front doors. This is a unique, inexpensive way to create the appearance of beautiful stained glass. It is a great alternative to using curtains or blinds.
The products I used to complete this project are from Gallery Glass Paints. You can find them in your local crafts store or on Amazon.
Faux Stained Glass DIY Project
Supplies:
- Gallery Glass Window Color
- Gallery Glass Liquid Leading
- Gallery Glass Plastic Sheet
- Toothpicks
- Plaid transparency paper
Instructions:
Step One:
Thoroughly clean the window with a cleaner (like Windex).
Step Two:
Pick out your design. You can find one on the Web or in the design books put out by Gallery Glass.
Step Three:
Place your design under the transparency.
Step Four:
Using the liquid leading, outline the design.
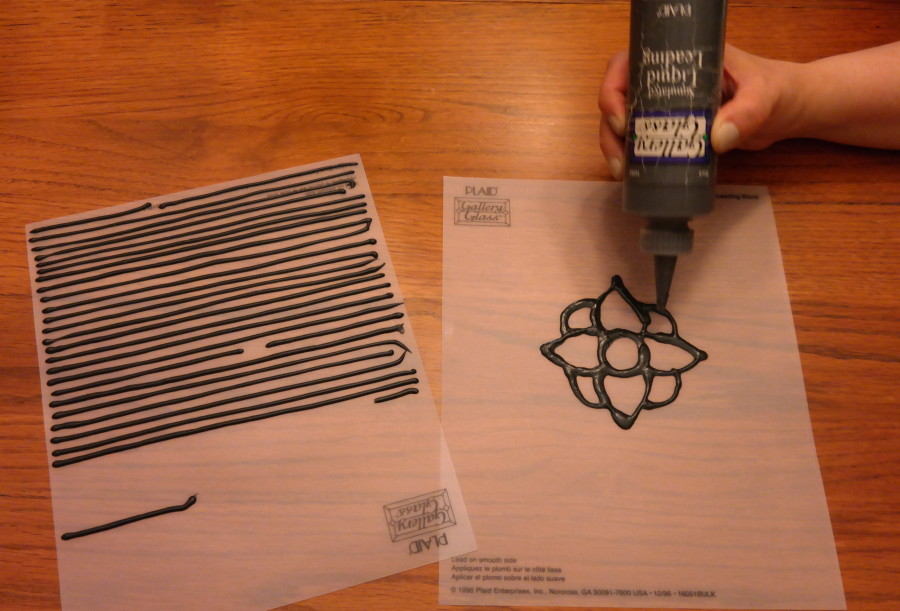
Step Five:
On another sheet make straight lead lines matching the dimensions of your window.
Allow designs and lead lines to dry overnight.
Step Six:
The next day, fill in the design with your chosen colors. Allow this to dry overnight.
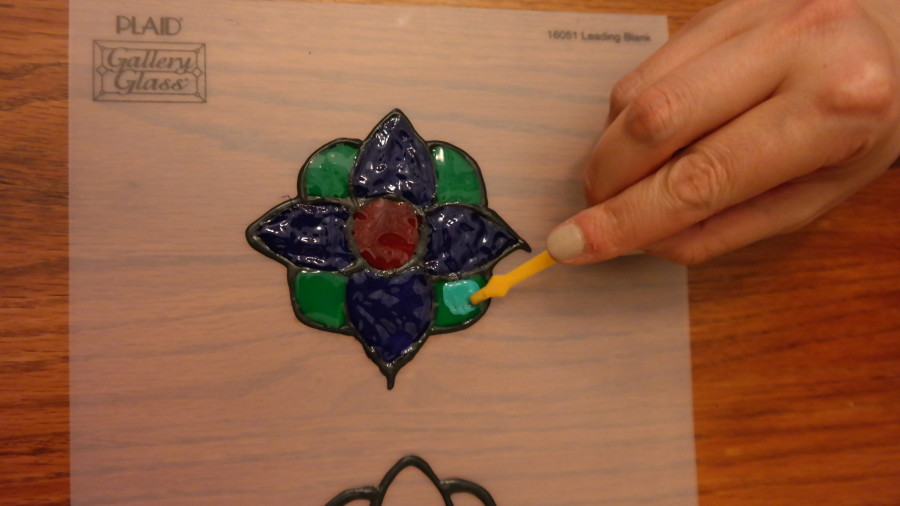
Step Seven:
Place the design and the lead lines on your window. Fill in the surrounding spaces with your chosen colors. You can use the bottle to move the color around the empty spaces. I prefer to use a toothpick.
When you’ve finished this project, you will have an amazing faux stained glass window!
For another variation on this project, see this stained glass window. For a kid-friendly project, see this ocean themed faux stained glass DIY project.

Leave a Reply