• About
  • PR
  • Privacy Policy
  • Disclosure
  • Contact

Family Fun Journal

  • Activities
    • Crafts
    • printables
  • DIY Home
    • Home Decor
  • Food
    • Appetizers
    • Beverages
    • Bread/Muffins
    • Breakfast
    • Crock Pot
    • Dessert
    • Dip
    • Entree
    • Side Dish
    • Snack
    • Soup
  • Holidays
    • Thanksgiving
    • Elf on the Shelf
    • Christmas
    • Valentines Day
    • Easter
    • Patriotic
    • St Patricks Day
    • Halloween
    • Holiday Recipes
      • Thanksgiving Recipes
      • Christmas Recipes
      • New Year’s Recipes
      • Valentines Day Recipes
      • Easter Recipes
      • Patriotic Recipes
      • St Patricks Day Recipes
      • Halloween Recipes
  • Shopping
  • Outdoors
  • Travel

Container Store Ceiling Decor

ByJessica Wellington 11 Comments January 6, 2013

A few months back, I wrote about a bathroom project involving decor screen panels from the Container Store. Check out my post about Container Store Bathroom Decor.

I can’t tell you how much I love the Container Store wall panels. They are inexpensive and very versatile. The panels come in two styles and several different colors. Each package contains four plastic panels.

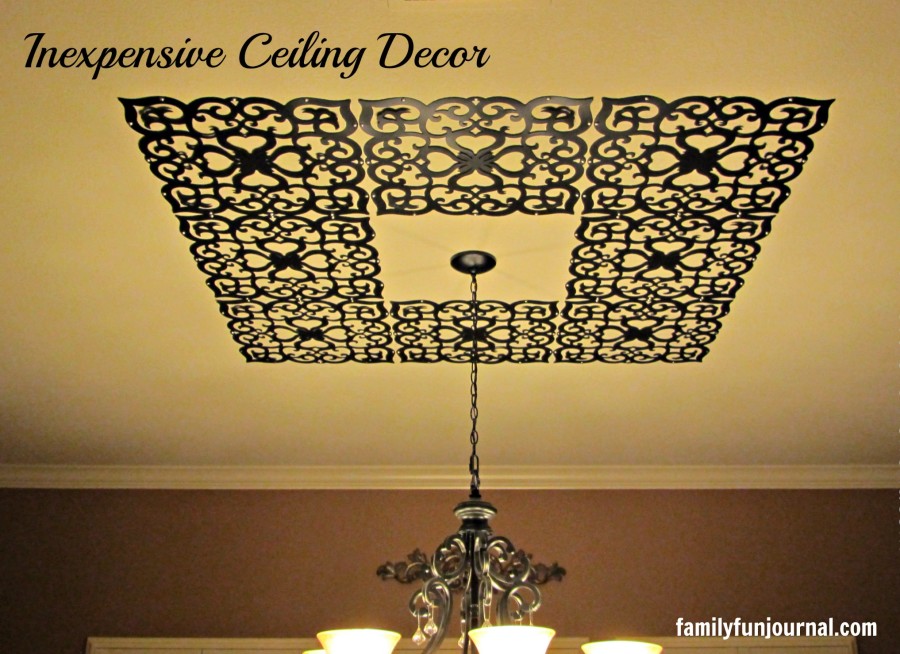
In order to accent my dining room light fixture, I decided to install the black filigree decor screen panels on the ceiling. This project cost about $30. It took two packages of panels and several boxes of silver tacks from my local hardware store. My dining room ceiling looks great. I’m amazed at how much the panels have added to the entire look of my room.

Here is my dining room ceiling after the panels.

container store ceiling decor

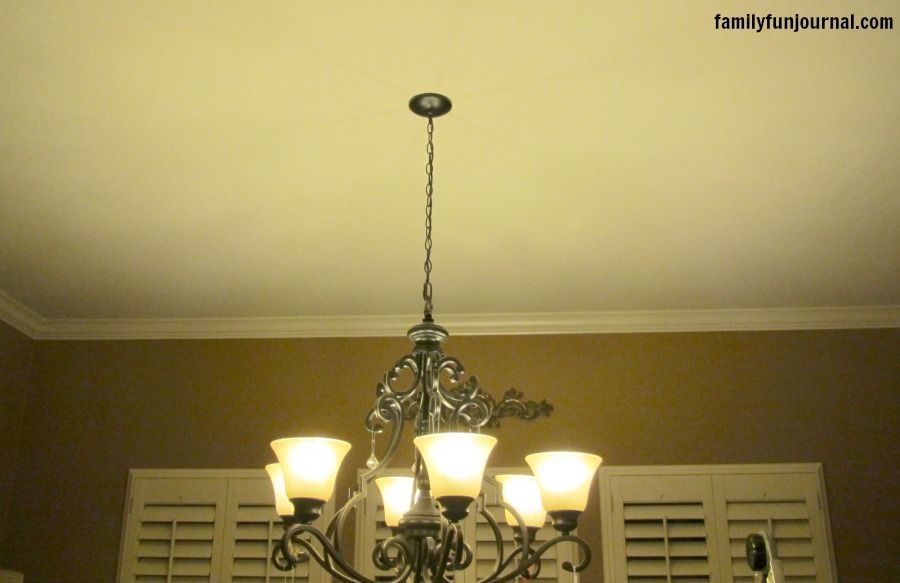
Here is my dining room ceiling before we installed the panels.

container store ceiling before

Since the panels already have pre-cut holes for tacks or nails, installing them was pretty simple.

Here is how we completed this project:


We drew out a pattern that would accommodate the two packages of panels.

We left an empty space immediately around the light fixture that was the same dimensions as a panel.

We installed two horizontal panels first and made sure those were level.

We used a laser level to check the panels on the ceiling.

It was the easiest way to deal with the large overhead area.

We then tacked up the other panels, using the installed panels as a guide.

I am stunned at what an impact these panels make on my dining room ceiling. It looks expensive and it was relatively easy to complete this project.

Since the Container Store offers several patterns, you could easily choose an option that matches the decor of your room.

I hope I’ve inspired you to spruce up your ceiling with these inexpensive Container Store wall panels.

About Jessica Wellington

Jessica is a professional journalist and social media influencer who inspires parents to have fun with their kids. You can also find her work in Parade Magazine.

Comments

  1. Suzan says

    January 9, 2013 at 00:55

    What a great idea!
    I have them hanging in my office window ( the same pattern even )
    I got mine from the dollar store ( Montreal, Canada ) but 2 in a package instead of 4……….
    My daughter has a wall done in them – and I have even used some of these for stencilling furniture
    A great product – and they look fantastic on the ceiling!
    Visiting from I should be mopping the floor
    Hugs,

    Reply
  2. Pary Moppins says

    January 10, 2013 at 07:08

    That’s so neat! I’ve never seen those before. Found you through Bloggy Moms.

    Reply
  3. Bobbie says

    January 11, 2013 at 20:58

    Oh Wow those look great! I love it.

    Reply
  4. Jessi @ Practically Functional says

    January 14, 2013 at 10:49

    Wow, I love it! What a great idea. 🙂

    Reply
    • Jessi @ Practically Functional says

      January 16, 2013 at 08:59

      Just wanted to let you know I featured this on my blog today! You can check it out here and grab a Featured button if you want: http://practicallyfunctional.net/2013/01/the-fun-in-functional-link-party-33/

      Reply
  5. Amy | Amy's Cooking Adventures says

    January 16, 2013 at 09:51

    Very cool! I can totally see doing this in my basement!

    Reply
  6. Katherines Corner says

    January 20, 2013 at 12:34

    Great job, very impressive. Thank you for sharing at the Thursday Favorite Things hop xo

    Reply
  7. Mimi says

    January 23, 2013 at 18:19

    I love the ceiling art! What a fantastic idea!! Looks wonderful.

    Reply
  8. Jamie Rippy (@MamaMommyMom) says

    February 16, 2014 at 19:38

    That is awesome! I’ve got to pin this so I won’t forget about it when I start designing my office. Love it!

    Reply

Trackbacks

  1. The Fun In Functional! {Link Party #33} - Practically Functional says:
    July 14, 2013 at 12:01

    […] Inexpensive Ceiling Decor – Hills Dale Home Front […]

    Reply
  2. The Fun In Functional! {Link Party #33} - Practically Functional says:
    October 1, 2013 at 22:37

    […] Inexpensive Ceiling Decor – Hills Dale Home Front […]

    Reply

Leave a Reply Cancel reply

Your email address will not be published. Required fields are marked *

Connect

  • Email
  • Facebook
  • Instagram
  • Pinterest
  • Twitter

Get new posts by e-mail:

Join us on Pinterest

Creative Crafts

hersheys pudding featured

Hershey’s Pudding Cup Animals

DISCLOSURE: Family Fun Journal contains ads and affiliate links. We participate in the Amazon Services, LLC Associates Program, an affiliate advertising program designed to provide a means for sites to earn advertising fees by advertising and linking to Amazon.com. All thoughts and opinions are our own.

Copyright © 2024 Jessica Wellington · Family Fun Journal · All Rights Reserved

Contact     Disclosure/Privacy
We use cookies to give you the best experience. See our Privacy Policy for more information.OKPrivacy Policy